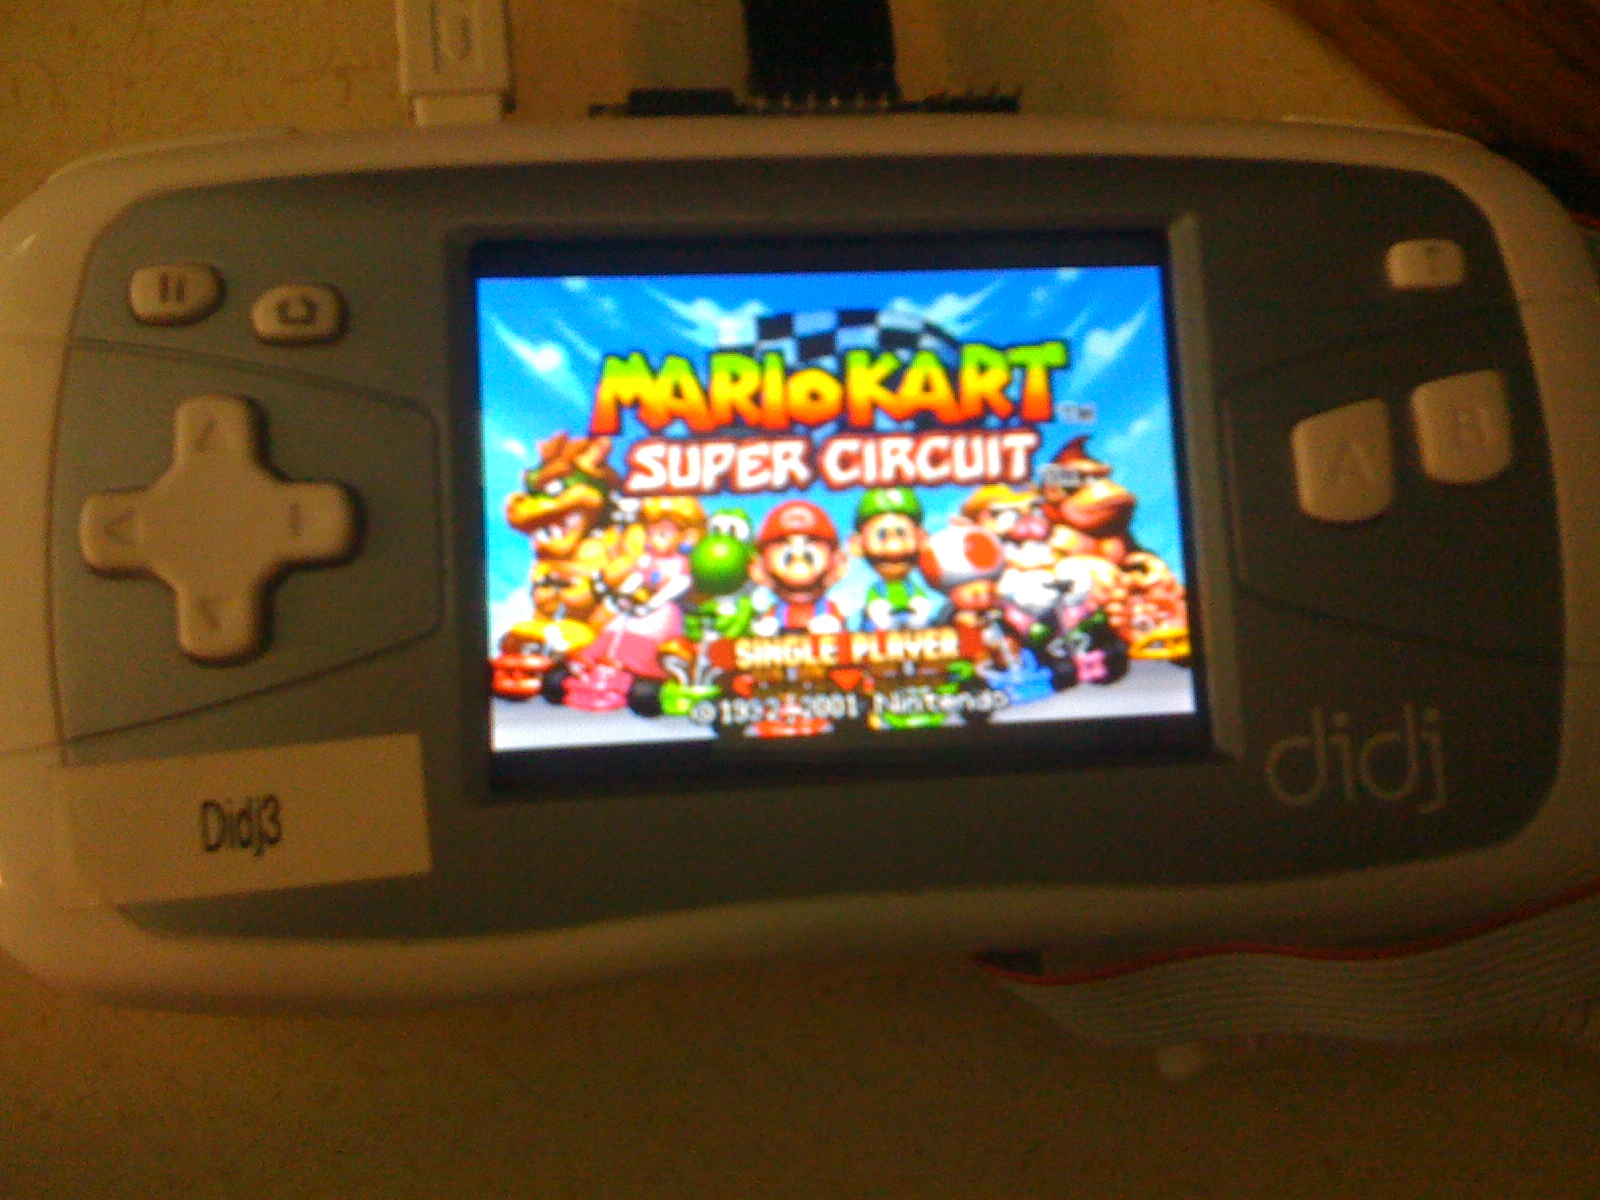
Something to cheer about if you were having second thoughts about those 3 Didj handhelds you bought on Woot a couple of months back. At long last, we have successfully ported an emulator (Exophase's gpSP GBA emulator - specifically, notaz's GP2X Wiz version) to both the Leapster Explorer and the Didj.
Source code, documentation and Leapster Explorer binaries are available on Github.
Thanks to Exophase and notaz for their superb work as well as to the great group on #Didj (freenode) - including GrizzlyAdams, PhilKll, zucchini, NullMoogleCable, Claude and many others...
I've been experimenting with the Didj handheld these past months, really diving into the world of embedded development. The Didj is a handheld game from Leapfrog targeted at 5-10 year old children. Among the many interesting things about the Didj: The device runs Linux, and some time after the device was launched, kernel sources were made available. Powering the Didj is the LF1000, a variant of the ARM9-based MagicEyes Pollux 3520F application processor. That same part also powers the new Leapster Explorer and other handheld games like the GPH Wiz, the forthcoming GPH Caanoo handheld demonstrated at E3 recently, as well as other devices including GPS navigators, HD radios, netbooks, thin clients, etc.
There's a really great group of people working together to discover and map the nuances of this device. Among the interesting things we are exploring is the built-in Composite Video output capability native to the Pollux CPU. Other Pollux handhelds (the Wiz) have exposed TV-out capability to users. In our research (which you can see here: http://elinux.org/Didj) we discovered that the Didj seems to possess TV-out capability, but it was not exposed to the general user by the manufacturer.
More specifically, in teardowns we've done, we noticed a test pad (TP6) close to where we knew the CVBS(Composite) output was located on the CPU BGA map. We suspected it to be our Composite Video out. Later, in a more detailed teardown which included desoldering the CPU to access the traces underneath, we confirmed that TP6 was indeed the connection needed for composite video.
The remaining challenge was to figure out a way to make this test pad work.
As it happened, I was curious about how Linux graphics drivers worked, and wanted to teach myself how to build a graphics driver of my own. The Video Out problem seemed like a good way to dive in, so I spent lots of time looking at the kernel source code learning how it all worked together. (There really isn't a better way to learn. I highly recommend just reading lots of code.).
It turns out that the drivers that ship with the Didj kernel sources have compiler pre-processor directives that can enable a 'Dual Display' mode, which pokes the appropriate CPU registers, and enables a framebuffer to be shared between the internal and external display. So the first thing I did was to fire up my cross compiler and build a new kernel with the appropriate directive (CONFIG_LF1000_DPC_DUAL_DISPLAY=y) just to see if it would boot. Upon transferring it via the Pollux UART boot mechanism using my trusty DJHI breakout, it booted up just fine. But since I had no connection yet, I could not verify if it worked.
With that, I figured that all that was needed to get this working was to physically access TP6, solder wire to it and to ground, and then connect the wire to a composite jack on the side of the device.
It wasn't that simple.
To begin with, I managed to fry the TP6 pad on my Didj. (Free advice: If your soldering iron has a temperature adjustment, set it properly. I did not pay attention to the fact that my iron was set waaay too hot, and the pad lifted right up.)
I ordered another device on eBay. It was a long 7 day wait. Once I got it, I opened it up, soldered IDE strands to TP6 and to ground (the cartridge socket), brought the connection out to an RCA jack on the side of the device, (I sacrificed one of the battery carriers) and then closed everything up.
I connected the RCA jack to my oscilloscope, booted up the Dual-display kernel, and...
...nothing. Or maybe it was something.
I expected a nice video waveform but instead I got a solid 3.6V. It looked like this:
I thought perhaps that the dual-display kernel wasn't working for some reason. So I took about a week of nightime work write my own user-space 'driver' to manually poke the appropriate registers on the CPU to enable dual-display. Looking at the kernel sources, it turns out there are a ton of registers to poke. And they need to be done in order.
Once I had my own test code ready, I threw that onto the device and ran it.
And I got the same 3.6V. (But at least I could, in theory, toggle the dual-display on and off).
At that point I sought out the advice of my fellow Didj hackers on freenode (#Didj). PhilKll, Claude, and GrizzlyAdams all suggested that some kind of filter circuit might be needed in order to work with what now looked to be a current-based Digital-to-Analog converter embedded in the Pollux CPU.
We figured a 75 Ohm resistor pulling TP6 to ground, and a 330pF cap in parallel would do the trick. I didn't have those specific parts, so I used parts I could scrounge up from my parts bin and from my local store (2x33 Ohm and 1x10 Ohm in series, and 2x100pF caps in parallel , plus the RCA connectors)
Here's what things looked like on the breadboard. (I've posted a schematic below the picture. As you can see on the breadboard, its pretty straightforward)
And with that, I connected what is basically a crude low-pass filter to my Didj and to the TV,and then booted the dual-display kernel.
For those of you who want to get started quickly, I've uploaded a dual-display enabled kernel zImage that you can place onto a microSD card which can be booted with our Lightning-Boot 1.4 boot loader.
I'll post dual-display how-to instructions to the wiki shortly.
Many many thanks to the folks on #Didj (freenode) whose pioneering work enabled me to get this hack working, including Claude, GrizzlyAdams, jburks, losinggeneration, NullMoogleCable, PhilKll, and many many more...

 nirvous
;)
;)
;)
;)
;)